Source: WebAim
A good heading structure is probably the most important accessibility consideration in most Word documents. Headings will allow screen reader users to navigate through the page easily and will make the page more usable for everyone. Many people do not use true styles in Word. For example, when creating a heading, they simply change the font, enlarge the font size, make it bold, etc. If this is done, the document has no real structure that can be discerned by a screen reader. In Word, the correct way to provide structure is to use Word styles. This section will outline how to add and edit headings in all common versions of Word. You can also add 1st, 2nd, or 3rd level headings using Ctrl + Alt + 1, 2, or 3 (Cmd + Option on a Mac).
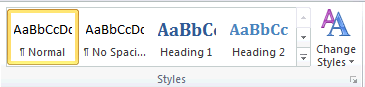
Styles in Microsoft Word 2010 for PC:
Styles in Microsoft Word 2011 for Mac:

There are a couple of advantages of having true structure in Word documents. First, when the file is exported to HTML, it will retain the structure, making it accessible to screen readers. Second, the structure will also be retained when exported to PDF. In both cases, the added structure increases the readability of the document for people using screen readers.
Using Styles
Source: Microsoft
Instead of using direct formatting, use styles to format your document so you can quickly and easily apply a set of formatting choices consistently throughout your document.
A style is a set of formatting characteristics, such as font name, size, color, paragraph alignment and spacing. Some styles even include borders and shading.
For example, instead of taking three separate steps to format your heading as 16-point, bold, Cambria, you can achieve the same result in one step by applying the built-in Heading 1 style. You do not need to remember the characteristics of the Heading 1 style. For each heading in your document, you just click in the heading (you don’t even need to select all the text), and then click Heading 1 in the gallery of styles.
On a PC using Microsoft Word 2010
- The Quick Styles that you see in the gallery of styles are designed to work together. For example, the Heading 2 Quick Style is designed to look subordinate to the Heading 1 Quick Style.
- The body text of your document is automatically formatted with the Normal Quick Style.
- Quick Styles can be applied to paragraphs, but you can also apply them to individual words and characters. For example, you can emphasize a phrase by applying the Emphasis Quick Style.
- When you format text as part of a list, each item in the list is automatically formatted with the List Paragraph Quick Style.If you later decide that you want headings to have a different look, you can change the Heading 1 and Heading 2 styles, and Word automatically updates all instances of them in the document. You can also apply a different Quick Style set or a different theme to change the look of the headings without making changes to the styles.
Built-in styles turn on timesaving features
The built-in styles (Heading 1, Heading 2, etc.) provide other benefits, too. If you use the built-in heading styles, Word can generate a table of contents automatically. Word also uses the built-in heading styles to make the Document Map, which is a convenient feature for moving through long documents.
TIP Try it. If you have a document that uses the built-in heading styles, open it, and on the View tab, in the Show/Hide group, select the Document Map check box. Click a heading in the document map to jump to the corresponding part of the document.
On a Mac using Microsoft Word 2011
- Select the words, paragraph, list, or table that you want to apply a style to.
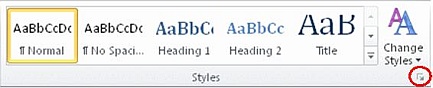
- On the Home tab, under Styles, click the style that you want.
To see more styles, point to a style then click the ![]() .
.
NOTES
After you apply styles to paragraphs, headings, and other elements, you can quickly apply a set of coordinated styles to your document. On the Home tab, under Styles, click Change Quick Styles settings , and then click the style set that you want.
If you are applying a style to a list, make sure to select one of the list styles. If you don’t, the bullets or numbering in the list might be removed.
Character and paragraph styles
Word provides several style types:
- Character and paragraph styles determine the look of most of the text in a document. Some styles work as both character and paragraph types, and these styles are known as linked styles.
- List styles determine the look of lists, including characteristics such as bullet style or number scheme, indentation, and any label text.
- Table styles determine the look of tables, including characteristics such as the text formatting of the header row, gridlines, and accent colors for rows and columns.
You can find more information about adding lists and tables to your document on the Office support website.
Character, paragraph, and linked styles
Character, paragraph, and linked styles appear in the Styles group on the Home tab. You can quickly apply a style from the gallery of styles. To see more information about each style, click the Styles Dialog Box Launcher.
The Styles task pane opens.
- Paragraph styles are marked with a paragraph symbol: ¶. You can see the paragraph symbol in the Quick Style gallery as well as in the Styles task pane. Click anywhere in a paragraph to apply the style to the entire paragraph.
- Character styles are marked with a character symbol: a. Click anywhere in a word to apply the style to the entire word. Or you can select more than one word to apply the style to more than one word.
- Linked styles are marked with both a paragraph symbol and a character symbol: ¶a. Click anywhere in a paragraph to apply the style to the entire paragraph. Or you can select one or more words to apply the style to the words that you selected.
Character styles
Character styles contain formatting characteristics that can be applied to text, such as font name, size, color, bold, italic, underline, borders, and shading.
Character styles do not include formatting that affects paragraph characteristics, such as line spacing, text alignment, indentation, and tab stops.
Word includes several built-in character styles, such as Emphasis, Subtle Emphasis, and Intense Emphasis. Each of these built-in styles combines formatting, such as bold, italic, and accent color, to provide a coordinated set of typographic designs. For example, applying the Emphasis character style formats text as bold, italic, in an accent color.
To apply a character style, you select the text that you want to format, and then you click the character style that you want.
- Click in the word you want to format.
- Move your cursor over the Quick Styles to see a preview of the formatting in your document. When you point to a character style, only the word where you clicked is formatted. When you point to a paragraph style or a linked style, the entire paragraph is formatted. Click the character style that you want to use.
- The word that you selected is formatted with the characteristics of the style that you chose.
Paragraph styles
A paragraph style includes everything that a character style contains, but it also controls all aspects of a paragraph’s appearance, such as text alignment, tab stops, line spacing, and borders.
For example, you can have a character style called Alert that formats text as bold and red. Additionally, you can have a paragraph style called Headline that formats text as bold and red. But the Headline paragraph style also centers the text horizontally and adds 24 points of space above the text.
In this scenario, if you select a paragraph and then apply the Alert style, all the text in the paragraph is formatted as bold and red, but nothing else about the paragraph changes. However, if you select the paragraph and then apply the Headline style, the text become bold and red, extra space is inserted before the paragraph, and the paragraph is centered between the left and right margins.
Word includes two built-in paragraph styles: Normal and List Paragraph. By default, Word automatically applies the Normal paragraph style to all text in a blank, new document. Similarly, Word automatically applies the List Paragraph paragraph style to items in a list — for example, when you use the Bullets command to create a bulleted list.
To apply a paragraph style, you select the paragraphs that you want to format, and then you click the paragraph style you want.
NOTE To select a single paragraph for applying a paragraph style, you can click anywhere in the paragraph. To select more than one paragraph, click anywhere in the first paragraph and drag to anywhere in the last paragraph that you want to select. You do not need to select the entire paragraph.
Linked styles
A linked style behaves as either a character style or a paragraph style, depending on what you select.
If you click in a paragraph or select a paragraph and then apply a linked style, the style is applied as a paragraph style. However, if you select a word or phrase in the paragraph and then apply a linked style, the style is applied as a character style, with no effect on the paragraph as a whole.
For example, if you select (or click in) a paragraph and then apply the Heading 1 style, the whole paragraph is formatted with the Heading 1 text and paragraph characteristics. However, if you select a word or a phrase and then apply Heading 1, the text that you selected is formatted with the text characteristics of the Heading 1 style, but none of the paragraph characteristics are applied.
- When you select or click in a paragraph and apply a linked style, the style is applied to the whole paragraph.
- When you select a word or phrase and apply a linked style, the style is applied only to the selected text.
- How is this useful? Consider the scenario above, in which an Alert character style and a Headline paragraph style each format text as bold and red. If the Headline style were a linked style instead of a paragraph style, you would not need a separate character style for formatting words and phrases. Wherever you want a headline in your document (bold, red, centered, with extra space above), you would select a paragraph and apply the linked style. Wherever you want an alert, you would select a word or phrase and apply the same linked style.
Word includes many built-in linked styles, notably the heading styles (Heading 1, Heading 2, and so on).
TIP You might want the first few words of a paragraph to coordinate with the formatting of the headings in your document. This type of formatting, known as a run-in head or a side head, is easy to apply by using linked styles. Select the first few words of a paragraph, and then apply a heading style.

- Select the first few words of a paragraph and then click a heading style to create a run-in head.
- Click in a paragraph and then click a heading style to create a heading.
Want to do more?
Review Microsoft’s website for information on: