The full roll-out of our new learning management system (LMS) TCU Online was well underway last fall with a pilot group and all new faculty. TCU Online is shaping up to be a vast improvement to Pearson LearningStudio, though it is not without its challenges. Those challenges mostly center around a change in thought process and design strategy, a change that will require some re-tooling and re-thinking to meet the unique challenges for each of your classes. I have found that it is easier to just start fresh with a new course shell instead of trying to fit the square peg of a course designed in LearningStudio into the new TCU Online round hole.
This fall semester, I’ve had the opportunity to work in TCU Online as part of the TCU Online Pilot Faculty group, and on the whole, the experience has been very positive. The system is generally intuitive, and if you can imagine it, you can probably do it. Those few times that I’ve run into roadblocks, the team at the Koehler Center has been extremely quick to help.
Currently, I use TCU Online with three different classes: From Rock to Bach, a rock music survey class with 240 students across two sections; Vocal Jazz Ensemble; and Elementary Ear Training. I use TCU Online differently for each class. In both Rock to Bach and Elementary Ear Training, TCU Online is where students turn in various assignments and can access their grades. Vocal Jazz uses TCU Online mainly as a repository for audio files that we’ve recorded in class and of music I want them to listen to. TCU Online handles audio files with ease.
Adding Audio and Video into Your Class
The ease with which TCU Online handles files of all kinds is one of the best features about this LMS. It has both simplified what I do and opened of a lot of possibilities for what I can do. Most importantly for me, TCU Online manages audio and video well and quickly. With LearningStudio, if I wanted to embed an audio file, I had to upload it to one particular location, and then edit the content area using the plain text editor instead of the visual editor. Sometimes, I would have to do the editing in one browser and then check to make sure it worked in another browser. And each browser handled the audio differently or not at all. Embedding YouTube videos was only slightly easier. With TCU Online, the uploading and formatting of audio and video happens right in the content area, and I can use the visual editor and not have to worry about HTML code. That alone has saved me significant time.
In addition to uploading audio and video, TCU Online allows you to record video or audio directly into the platform in a number of different places, without the need of a separate program or application. Students can record three-minute videos or audio files within assignment folders and I can record video or audio responses to their assignments. Essentially, almost anywhere you can type content, you can record content directly in that place. All that is needed is for your computer to have a camera and/or microphone.
Using Release Conditions
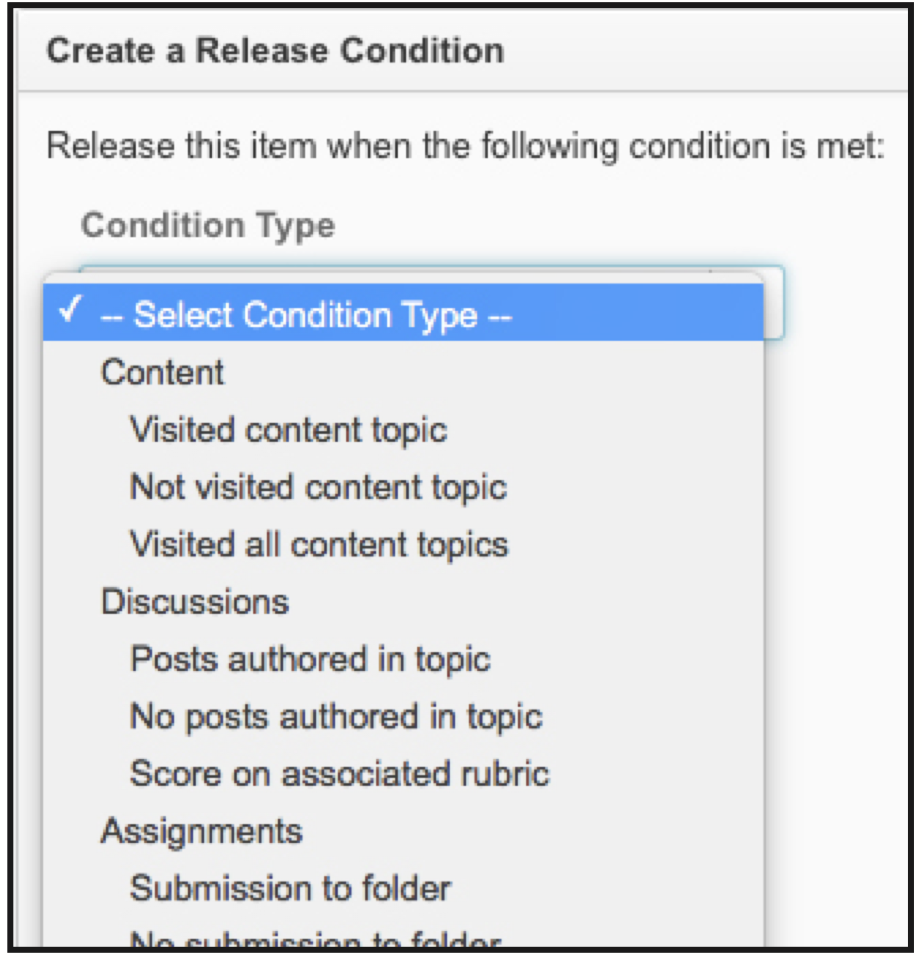 Another exciting feature of TCU Online is the ability to add release conditions to almost any content area or tool, so that only the students who need access to those areas can. Release conditions can hide these content areas or tools from students until they’ve completed certain tasks. For instance, a quiz might only become available after the student has viewed a particular content item. You can release some content to only assigned groups of students. In my Vocal Jazz course, I upload audio of the students recorded in class, but assign each audio track only to the student singing on it by using release conditions. The ability for my students to listen back to their own voices is a great pedagogical tool. Using the release conditions allows me to take advantage of this tool while keeping student work confidential.
Starting with the Grades Tool
As you begin to prepare your courses in TCU Online, it is important to remember that it works best if you can design your course backwards from the Grades tool. Before adding assignments or content, start with Grades. The new gradebook takes some time to get used to it as there are more variables and options than LearningStudio. However, starting from Grades will make your life easier in the long run. As you add assignments, content areas, discussions, quizzes, and other tools you can attach them directly to Grades. Once set up, your interaction with Grades during the semester is very smooth. Whether you’re dealing with ten students or 240, entering grades is easy and efficient. You can even combine sections into one shell. The interface makes it easy to work all the students at once, or only those from a particular section.
Making the switch from LearningStudio to TCU Online is not without its challenges and will definitely take some significant time up front. But, the payoff in the long run is worth it. It is difficult to overstate the benefits and advantages of this system over LearningStudio, and many days this semester, I have found myself almost giddy with joy at how I’m able to make TCU Online work for me. I believe you will find it to be a great tool for your classes as well.
This article was written by Amy Stewart, School of Music for the Spring 2017 Issue of Insights.